Installation
Install the zip in Blender, enable the addon, and check where the panel appears. This page also explains what Volume Forge creates in the scene.
Install the addon
- Open Blender.
- Go to Edit → Preferences → Add-ons.
- Click Install… and select the addon zip file.
- Enable the addon after installation.
- Open the 3D View sidebar with N and locate the Volume Forge tab.
Where the panel appears
The addon lives in the 3D View sidebar. The panel title is Volume Forge.
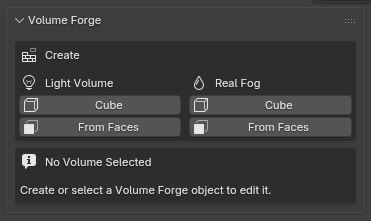
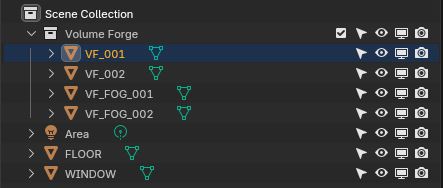
What gets created in the scene
- A dedicated collection named Volume Forge.
- A mesh object for the created volume.
- A unique material for that object, so each volume keeps its own settings.
Important note for Cube creation
Both Cube buttons create the object at the current 3D Cursor position. If the result appears far away, check the cursor location first.
User preset files
User Presets are stored in a Volume Forge preset file on disk, outside the scene. The exact folder can vary by system, so use Open Presets Folder in the panel or in the add-on preferences when you need to inspect or back up the file.
A custom preset folder can be set from the Volume Forge add-on preferences. Avoid placing that custom folder inside the add-on installation folder, because reinstalling or updating an add-on can replace that area.